If you’ve ever stood in the hair dye aisle feeling more overwhelmed than excited, you’re not alone — and you’re not underprepared. You just haven’t had the right information yet. There’s a real difference between picking up a box and hoping for the best, and approaching the process with a clear, confident plan.
A lot of what determines your result happens before the dye even touches your hair — the shade you choose, the tools you gather, the way you section and apply. These are details that rarely make it onto the back of a box but make an enormous difference in practice. This guide on how to dye your hair at home is designed to give you that full picture, drawn from a genuine understanding of how color works — not just how it’s marketed.
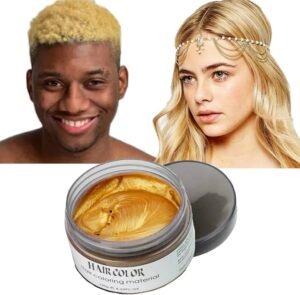
Why More People Are Dyeing Their Hair at Home
At-home hair color has quietly shifted from a backup plan to a deliberate, confident choice — and the trend shows no signs of slowing. With a top-tier hair dye manufacturer now providing professional-grade formulations directly to consumers, alongside smarter tools and a more informed user base, everything has moved in the same direction at once.
- Convenience fits modern routines. People want beauty habits that work around their lives, not the other way around. Scheduling a salon visit every six to eight weeks is a commitment that simply doesn’t fit everyone — at-home color makes root touch-ups, gray coverage, and subtle refreshes achievable on your own timeline, without the wait.
- Cost savings are too significant to ignore. A standard salon color service can run anywhere from $80 to $180; a quality at-home kit rarely exceeds $30. Over the course of a year, that gap adds up to real money.
- People want more control over their results. The rise of do it yourself hair coloring has given consumers a stronger sense of ownership over their appearance. With access to better product guidance and a wealth of shared knowledge online, more people feel genuinely equipped to manage their own color safely and confidently at home.
Everything You Need to Gather Before You Start
Skipping this step is the most expensive mistake you can make — and I don’t mean financially. Running out of clips mid-application, realizing your gloves have a hole in them, or hunting for a timer while dye is already processing — these are the moments that throw off an otherwise solid result. Get everything together before you open a single bottle. It takes ten minutes and genuinely changes how the whole thing goes.
The Essential Hair Dye Kit: Tools and Materials
Your box kit covers the basics, but a few extras are worth grabbing ahead of time.
- Applicator brush and mixing bowl. Nozzle bottles are fine for quick root touch-ups, but if you want real control — especially around the hairline, ears, and part — a brush and bowl is the better tool. Precision matters most in those spots.
- Sectioning clips. Four to six clips, depending on your hair’s thickness. Trying to work through unsectioned hair is where uneven results begin. It’s a small thing that makes an outsized difference.
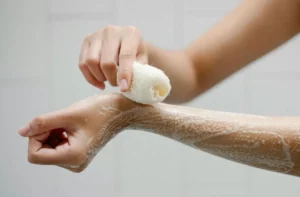
- Gloves, petroleum jelly, and a towel you don’t love. The gloves included in most kits are workable but thin — a backup pair costs almost nothing. Run petroleum jelly along your hairline and the tops of your ears before you start. It creates a barrier that keeps staining off skin without affecting the dye near your roots. However, if a smudge does happen, knowing exactly how to get hair dye off skin at home will save you from harsh and irritating scrubbing.
Setting Up Your Workspace for a Mess-Free Experience
Choose a bright, well-ventilated area with a mirror and easy access to water. Cover the counter, floor, and nearby surfaces before you begin — hair dye stains quickly, and once your gloves are on, you won’t want to be searching for paper towels.
Lay your tools out in application order: dye, bowl, brush, clips, gloves, towel, timer, conditioner. This small step makes the process feel calmer and more controlled. One safety note worth taking seriously: keep hair dye away from your eyes and never apply it to eyebrows or eyelashes, as the FDA has cautioned that doing so can cause serious eye injury.
Step-by-Step: How to Dye Your Hair at Home
This is where preparation pays off. If you’ve got everything laid out, your sections planned, and your timing ready, learning how to color hair at home is more straightforward than most people expect. Work through each step in order — skipping ahead is where things tend to go wrong.
Step 1: Read the Instructions Carefully
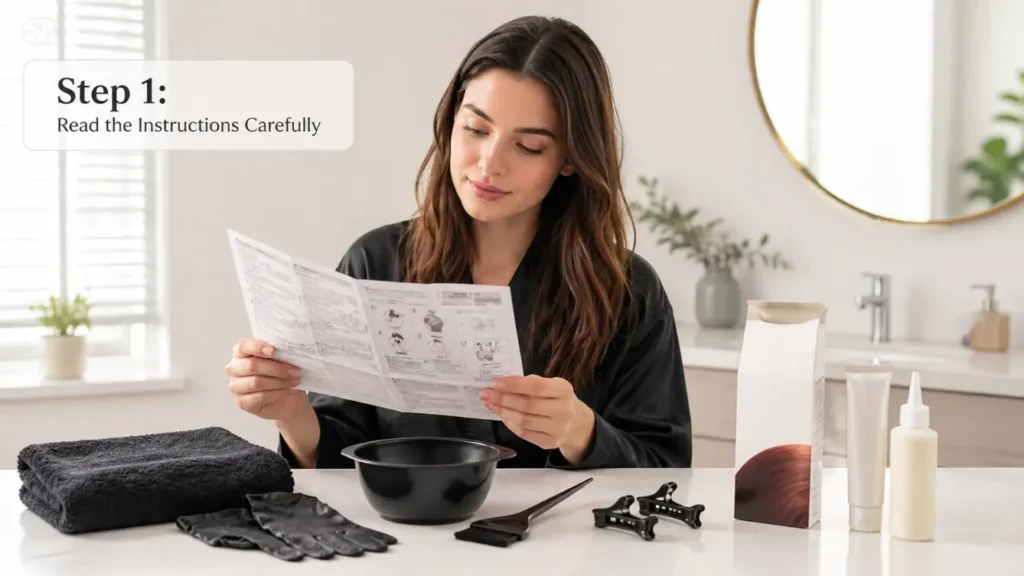
Every dye formula is slightly different. Whether you’re working with a drugstore brand or choosing to dye hair with a Garnier kit, processing times, mix ratios, and special warnings vary between products — sometimes significantly. Read the instructions fully before you touch anything else. Not a skim — the whole thing. It takes three minutes and removes a surprising amount of guesswork from every step that follows.
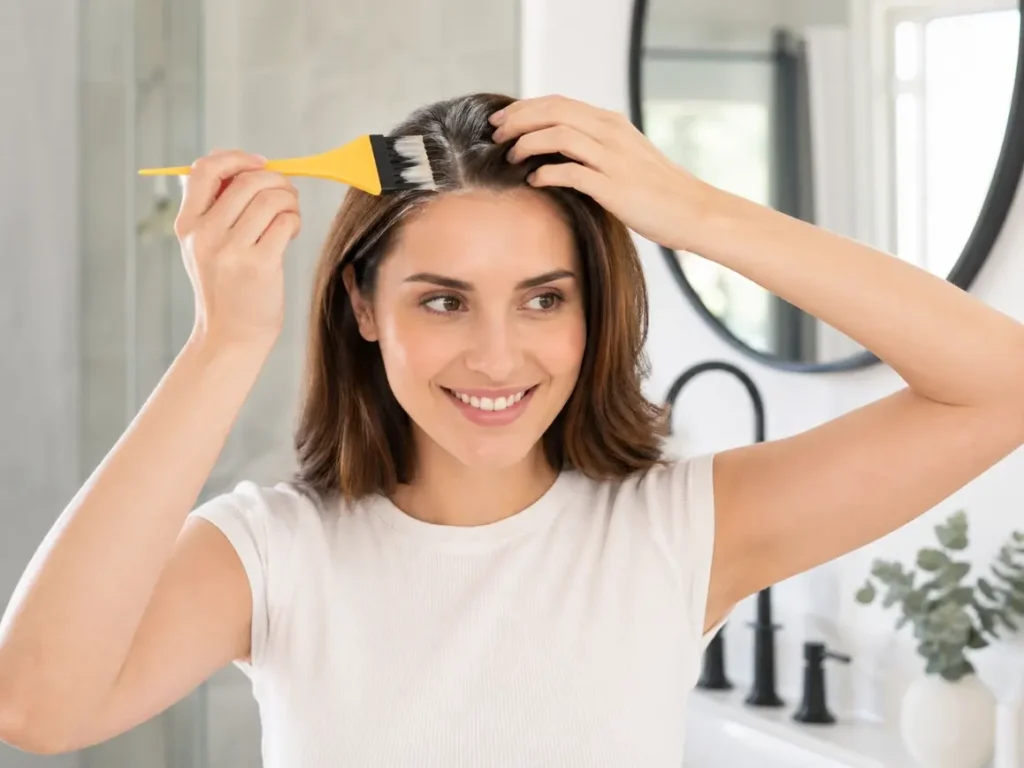
Step 2: Mix the Dye Correctly
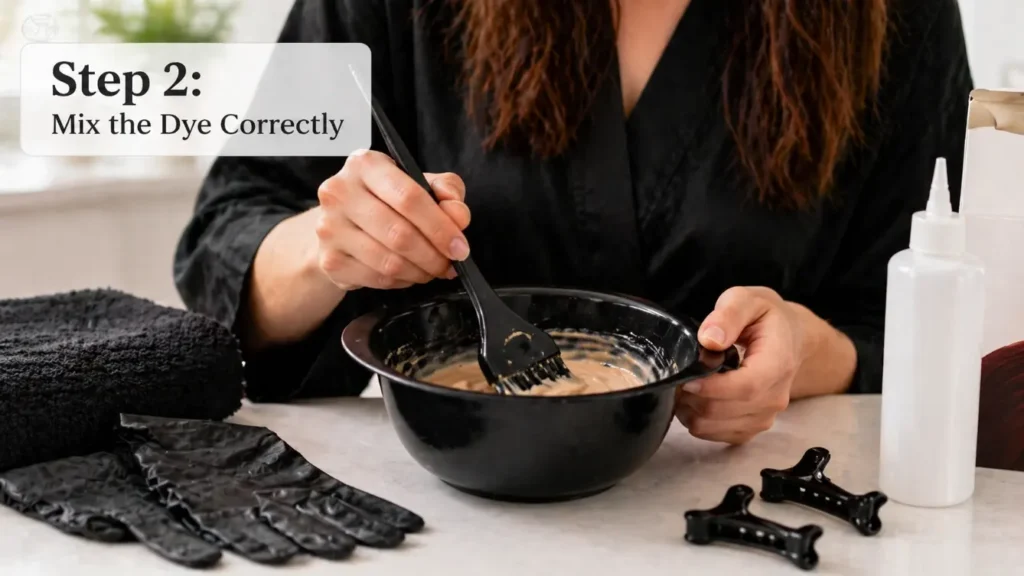
Combine the colorant and developer in your mixing bowl exactly as directed. Undermixing leaves the formula unactivated in spots; overmixing accelerates oxidation before it reaches your hair. Stir until the color is completely uniform — no streaks, no separation — then move immediately. Mixed dye has a working window, and waiting around shortens it.
Step 3: Divide Hair Into Clean Sections
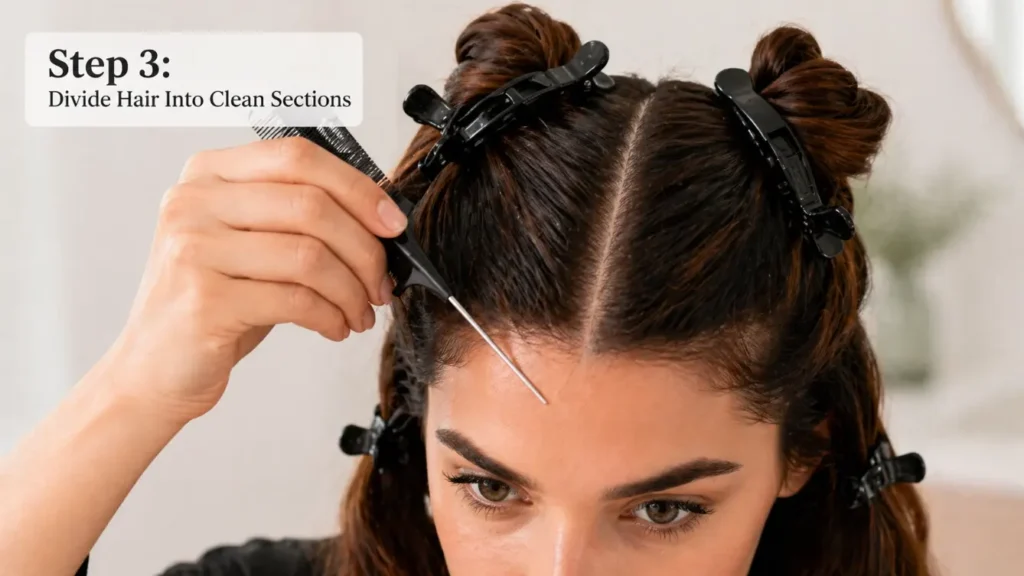
Part your hair straight down the middle from forehead to nape, then again from ear to ear across the crown. Clip each of the four quadrants up and work through them one at a time. Trying to apply color to loose, unsectioned hair is the fastest route to uneven results — this step alone accounts for much of the difference between a good outcome and a frustrating one.
Step 4: Apply Dye to Roots, Lengths, or Ends Based on Your Goal
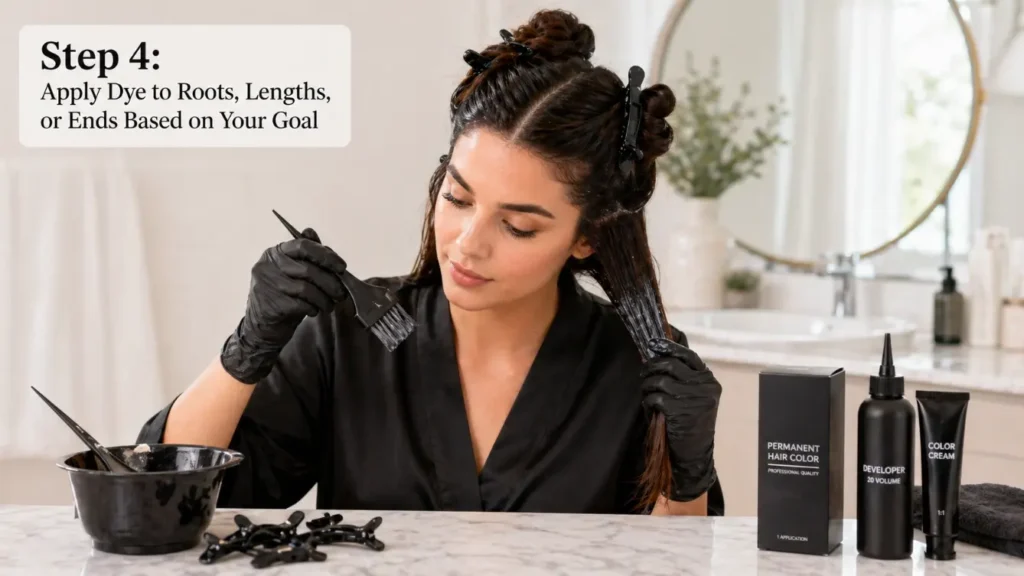
How you approach the colouring process depends entirely on your hair’s history:
- Virgin hair (never colored): Apply dye to mid-lengths and ends first, leaving the roots for the final 10 to 15 minutes. The natural heat from your scalp accelerates processing at the root, and starting there first often results in a noticeably brighter band of color at the base.
- Root touch-ups: Apply the formula strictly to new growth. Previously colored ends are more porous and will absorb fresh pigment aggressively — dragging permanent color through to the ends every session leads to over-processing and an uneven buildup over time.
- Full refresh on previously colored hair: Work from mid-lengths to ends first, then apply to roots in the final 10 to 15 minutes to avoid over-darkening at the scalp.
Step 5: Set a Timer and Wait
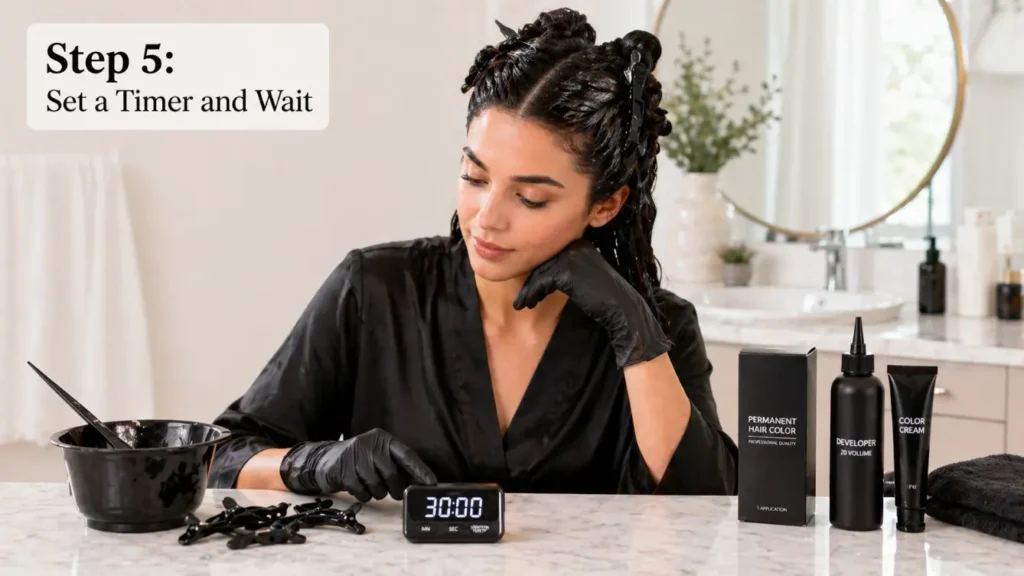
Once the application is complete, start your timer immediately. This is one area where the question of how long do you leave in hair dye has a clear answer: exactly as long as the instructions specify — not longer, not shorter. Don’t guess, and unless the formula explicitly calls for it, skip the plastic cap or added heat. Altering the environment alters the chemical reaction, often not in your favor.
Step 6: Rinse Until the Water Runs Mostly Clear
When the timer goes off, rinse with lukewarm water — never hot. Hot water forces the hair cuticle open, pushing freshly deposited color out faster than necessary. Gently massage the scalp to emulsify the dye and keep rinsing until the runoff is nearly clear. Your hair is in a delicate state right now — avoid scrubbing aggressively.
Step 7: Condition and Style Gently
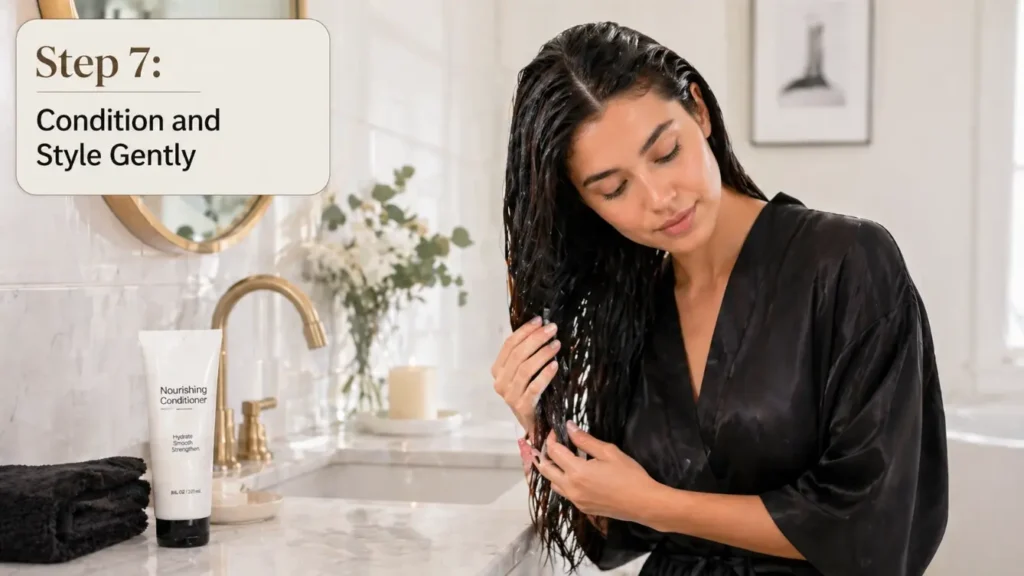
Apply the conditioner included in your kit generously — it’s specifically formulated to close the cuticle and lock in color after processing. Leave it on for the full recommended time, then rinse. If you can skip the blow dryer today, do it. Air drying puts zero additional stress on freshly colored hair and lets the result settle at its best. Try to hold off on heat styling for at least 48 hours to allow the color to fully stabilize.
How Long Should You Leave Hair Dye In?
It’s one of the most searched questions in the at-home color space, and it deserves a better answer than “check the box.” Processing time is one of the few variables where guessing carries real consequences — in both directions.
Why Processing Time Varies by Formula
Not all dyes work the same way, and timing reflects that directly. Permanent color typically requires 30 to 45 minutes to fully deposit pigment. Semi-permanent formulas work without a developer, so they generally sit closer to 20 to 30 minutes. Darker shades, high-lift colors, and formulas designed for resistant or coarse hair each carry their own requirements. The number on the instructions isn’t a rough estimate — it’s based on the specific chemistry of that product.
What Happens If You Rinse Too Early
Cutting the colouring process short means uneven saturation — often lighter at the roots, faded at the ends, or missing the depth the shade was designed to deliver. Gray coverage is especially sensitive to early rinsing; those resistant strands need the full processing window to absorb pigment reliably.
What Happens If You Leave Dye on Too Long
Longer isn’t better — it’s just more exposure. Once the color has fully developed, the developer continues working on the hair structure rather than the pigment. That translates to unnecessary dryness, a rougher cuticle, and sometimes a result that reads darker or flatter than intended. Leaving it on an extra 20 minutes doesn’t deepen the color — it just stresses the hair.
Why Timers Matter for Beginners
Memory is unreliable when you’re multitasking or doing this for the first time. A timer removes the guesswork entirely. Set it the moment the last section is coated — not when you started mixing, not when you began applying. That window is what counts, and protecting it is one of the simplest things you can do to protect your result.
Common At-Home Hair Dye Mistakes to Avoid
Every at-home color experience teaches you something. The goal, ideally, is to learn from other people’s lessons rather than your own. These are the mistakes that come up most consistently — not because they’re hard to avoid, but because most people don’t know to look out for them until it’s too late.
Choosing a Shade Too Far From Your Natural Color
Going one or two shades lighter or darker than your natural color is well within what at-home dye handles reliably. Anything more dramatic — dark brown to bright blonde, or black to a vivid fashion shade — involves a level of chemical lift that most box kits aren’t designed to manage safely in a single step.
If a significant change is what you’re after, a more realistic approach looks like this:
- Move in stages across multiple sessions, spaced at least a few weeks apart
- Use a strand test between each step to track where your hair actually lands
- Consider a toner or gloss to refine tone once you’re close to your target shade
Your hair will hold up better for it, and the result will be more controlled every step of the way.
Skipping the Patch Test or Strand Test
These feel like formalities until they aren’t. A patch test — applied behind the ear or at the inner elbow 48 hours before coloring — is the only reliable way to catch an allergic reaction before it becomes a serious problem. According to the American Academy of Dermatology, symptoms to watch for include redness, itching, swelling, or persistent irritation at the test site. If any of those appear, don’t proceed.
A strand test serves a different purpose: it tells you how the color will actually land on your specific hair, which doesn’t always match what’s on the box. Both tests take minutes. Skipping them saves nothing and risks considerably more than most people account for.
Applying Dye Unevenly
Uneven application usually comes down to two things: rushing and skipping sections. Moving too quickly means some areas get saturated thoroughly while others barely make contact with the formula — showing up as patchiness or noticeable variation in depth. Slow, methodical application is what consistent coverage actually requires.
Overlapping Color on Previously Dyed Hair
This one is quiet but cumulative. Applying fresh dye over already-colored hair builds up chemical exposure over time. If you are ever unsure about the correct timeline between applications, understanding exactly how often you should dye your hair is crucial for preventing this cumulative damage. The consequences of overlapping tend to surface gradually:
- Increased dryness and brittleness along mid-lengths and ends
- Loss of elasticity, which shows up as breakage during brushing or styling
- Color that reads uneven because older and newer deposits react differently
When doing a root touch-up, keep the new color on the regrowth only. Pull it through to the ends in the final few minutes if a refresh is needed — not from the start.
Ignoring the Instructions on the Box
Instructions are written for that specific formula — not hair dye in general. Processing times, mix ratios, and application sequences vary more between products than most people expect, and assuming one brand works like another is where things quietly go wrong. Read them fully, before you start, every single time.
Conclusion
Knowing how to dye your hair at home is a genuinely useful skill — one that saves money, builds confidence, and gives you real control over how you look. The process becomes significantly more approachable when someone breaks it down clearly and honestly, which is exactly what this guide set out to do. Take your time, follow the steps, and don’t skip the preparation. A great result at home is well within reach.
Frequently Asked Questions
Can I dye my hair if I’m using minoxidil?
Yes, but with caution. Wash your hair thoroughly to remove all minoxidil residue before applying color, and wait at least 24 hours after dyeing before resuming your routine. Consult your dermatologist beforehand if you have any concerns.
What is the best hair dye for chemo patients?
Post-chemotherapy hair and scalps are highly sensitive. Avoid permanent dyes containing ammonia and opt instead for gentle, semi-permanent formulas enriched with conditioning ingredients. Always get medical clearance from your oncologist before proceeding.
Can I dye my hair if I have scalp dermatitis?
Avoid coloring during an active flare-up. Alkaline dye formulas can seriously irritate a compromised scalp barrier. Wait until your scalp has fully healed, or consider off-scalp techniques like balayage carried out by a professional.
How do I color my hair at home for the first time?
Start with a shade no more than one to two levels away from your natural color, and choose a demi-permanent formula to minimize risk. Follow the instructions carefully, and never skip the patch and strand tests.
How can I color my hair at home like a professional?
Skip the squeeze bottle and use a non-metallic mixing bowl and tint brush for precise, even application. Divide your hair into four clean sections, work methodically, and choose a quality formula suited to your hair type. Preparation is what separates a professional-looking result from a rushed one.